
CDPの操作方法
2つのルータを利用したCDP操作の練習

CDPの役割や機能を学習するために2つのルータRouterAとRouterBに次のような初期設定をします。
RouterAの設定
Router# config termianl
Router(config)# hostname RouterA
RouterA(config)# interface ethernet 0
RouterA(config-if)# ip address 192.168.1.1 255.255.255.0
RouterA(config-if)# no shutdown
RouterA(config-if)# exit
RouterA(config)# interface serial 0
RouterA(config-if)# ip address 192.168.2.1 255.255.255.0
RouterA(config-if)# no shutdown
RouterA(config-if)# end
RouterA#
RouterBの設定
Router# config termianl
Router(config)# hostname RouterB
RouterB(config)# interface ethernet 0
RouterB(config-if)# ip address 192.168.3.1 255.255.255.0
RouterB(config-if)# no shutdown
RouterB(config-if)# exit
RouterB(config)# interface serial 0
RouterB(config-if)# ip address 192.168.2.2 255.255.255.0
RouterB(config-if)# no shutdown
RouterB(config-if)# clock rate 64000
RouterB(config-if)# end
RouterB#
show runを行って正しく設定されているかを確認し、さらにRouterAに対してpingを飛ばしてみましょう。
RouterB# ping 192.168.2.1
つぎにRouterAでshow cdpコマンドを実行します。
RouterA# show cdp
Global CDP infomation:
Sending CDP packets every 60 seconds
Sending a holdtime value of 180 seconds
上記の例ではCDPが有効化されており、CDPの更新間隔が60秒、ホールドタイム値が180秒になっています。
このCDPの更新間隔を90秒に変更してみましょう。
RouterA# config terminal
RouterA(config)# cdp timer 90
RouterA(config)# end
RouterA#
show cdp コマンドを実行してCDP更新時間が60秒から90秒に変更されたことを確認してみましょう。
Router情報の表示
隣接している側のルータ情報をコマンドによって表示させてみましょう。
RouterA# show cdp neighbors detail


Device ID: RouterB
Entry address(es):
IP address 192.168.2.2
Platform:cisco ...........
------------------etc
|
|
|
RouterA#
RouterBの情報が表示されます。
同じようにRouterBに対してもshow cdp neighbors detail を実行し、そしてRouterAの情報が表示されることを確認してみてください。
また同じ意味のコマンドとして、
show cdp entry *
というのがありますので実際に入力して同じ結果が出ることを確かめてみましょう。
その他の類似コマンドなど
RouterB# cdp
RouterB# show cdp interface
RouterB# show cdp neighbors
RouterB# show cdp neighbors detail
上記のコマンドにおいてshow cdp neighbors detail (show cdp entry *)だけにレイヤ3の情報が表示されます。
-
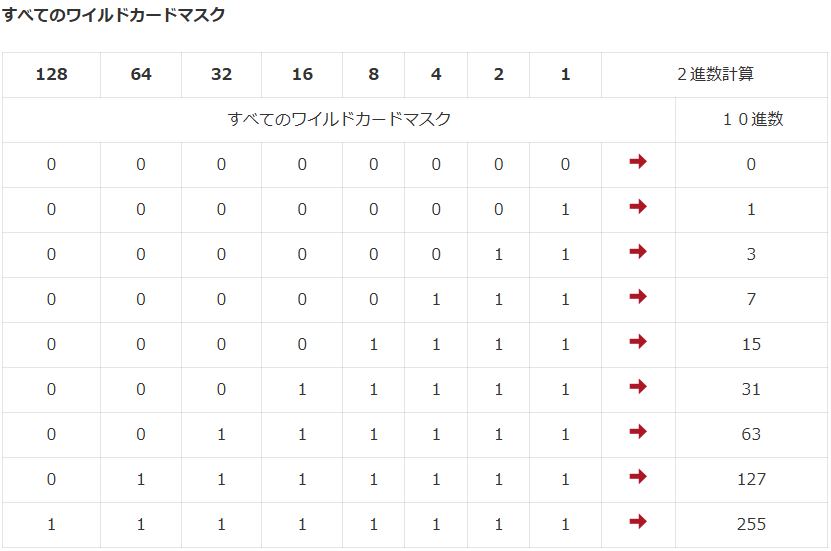
ワイルドカードマスク
カテゴリー
-
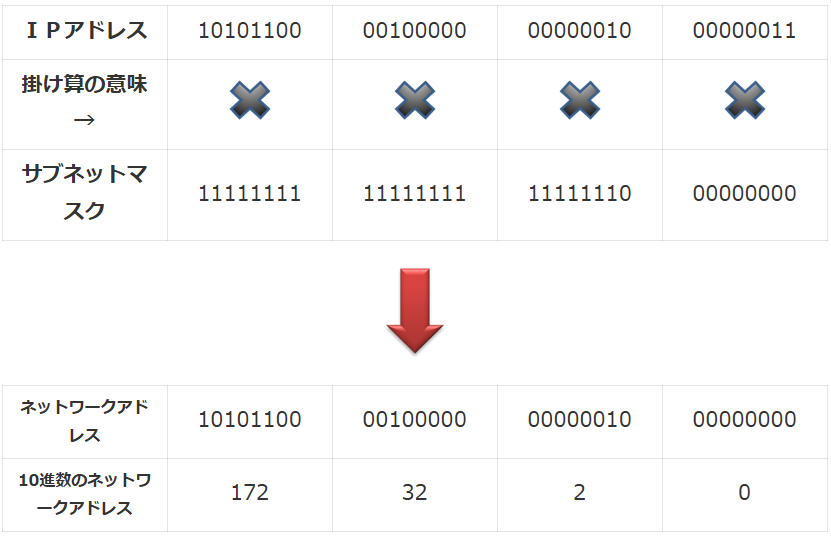
サブネットマスク
カテゴリー
-
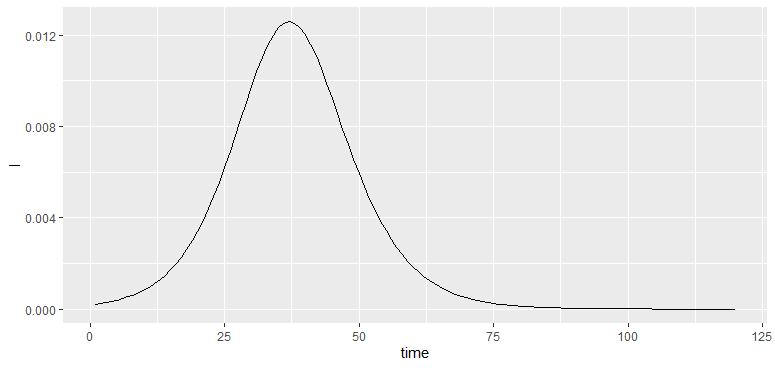
感染率による感染者数増加の比較
カテゴリー
-
Rでggplot2によるグラフ描画
カテゴリー
-
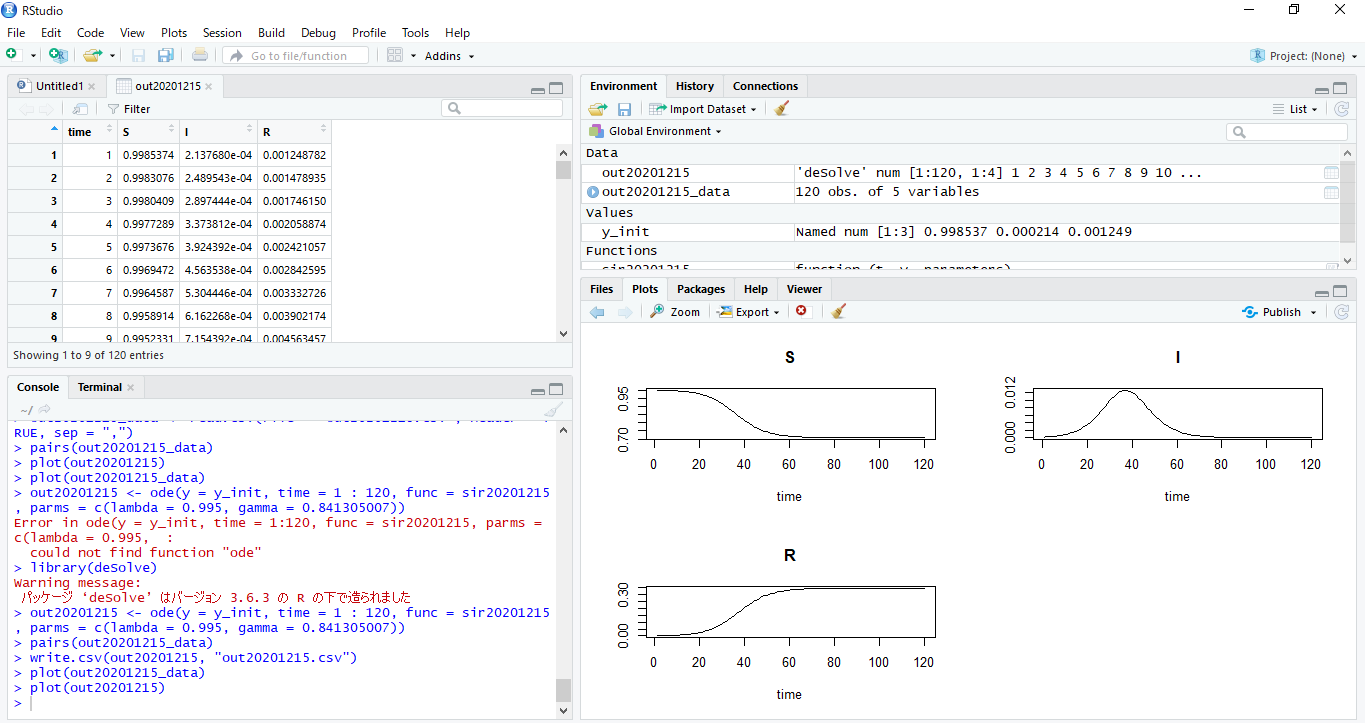
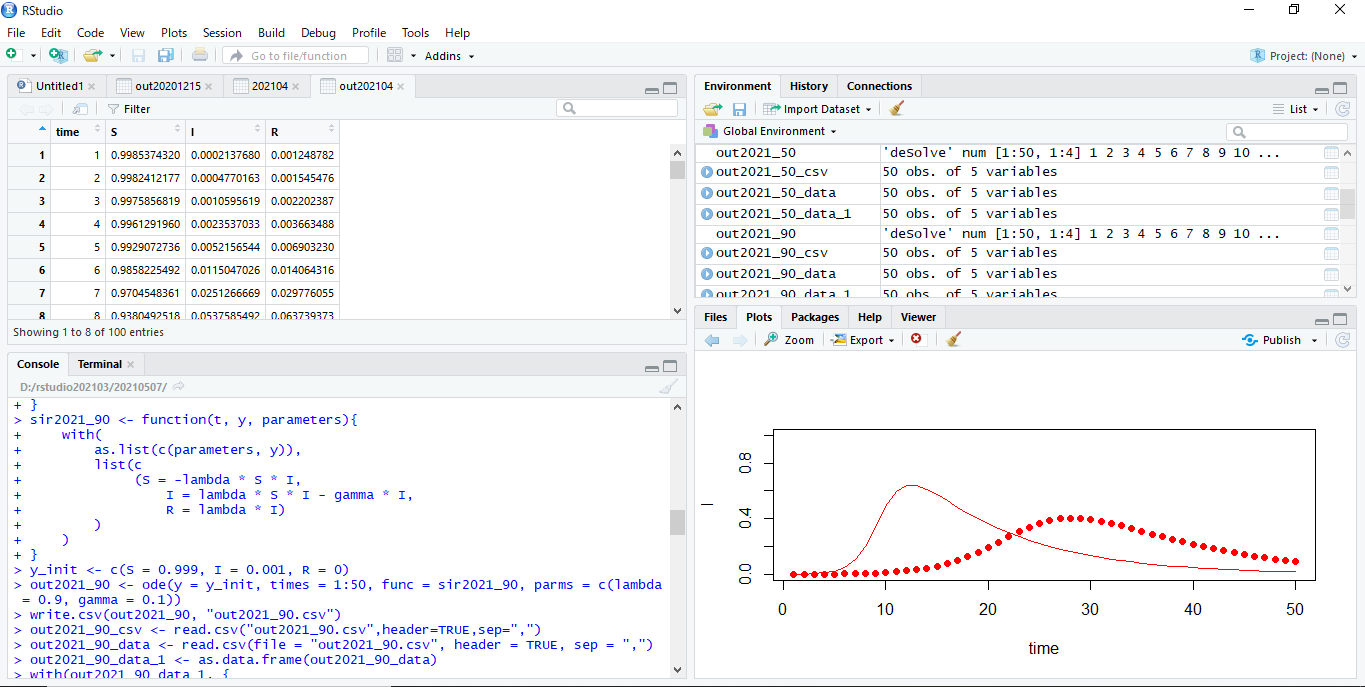
RstudioでSIRモデル①
カテゴリー
-
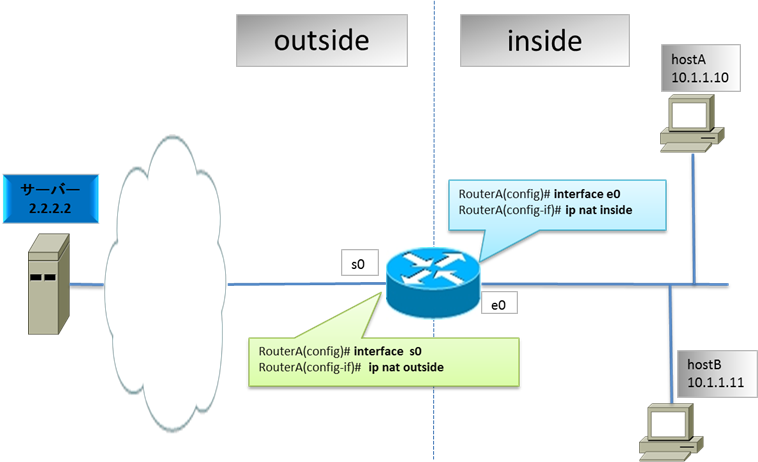
NAT(Network Address Translation)
テスト投稿
-
ワイルドカードマスク
続きを読む
-
サブネットマスク
続きを読む
-
感染率による感染者数増加の比較
続きを読む
-
Rでggplot2によるグラフ描画
続きを読む
-
RstudioでSIRモデル①
続きを読む
-
NAT(Network Address Translation)