
CentOS Stream9
Stream9 2024年さくらVPS実装
現在は通常のレンタルサーバで運用されていますが当初このドメインはVPSサーバのCentOS Stream9で構築していました。2024年時点でのCentOS Stream9の導入にて実施して気づいたことや注意点などの内容に関して順を追っていくログになります。
イレギュラーなシステムエラー
まず初めに言うとOSのバージョンでStream9を選択した場合、CentOS Stream9のスペック選択でメモリ512M、および1Gが選べるのですがこれだと途中でPuttyが止まってしまいそれ以降設定・構築ができません。通常リリースする前に実施検証を行っているはずなので、それを行っていればこのような事態は把握できる(できている)はずなのですが、なぜ選択不可にするなどの対応をしていないのか、私にはこの会社の考えているところがよくわかりません。
ひとまずは無料期間を選択してから行うのが妥当かと思われます。もちろん試しに1G以下で実施するのもありだと思います。実際に上記のようなことが起こるかどうかを試してみるのもいいでしょう。無料期間中であれば一切お金はかからないようです。
スケールの選択設定
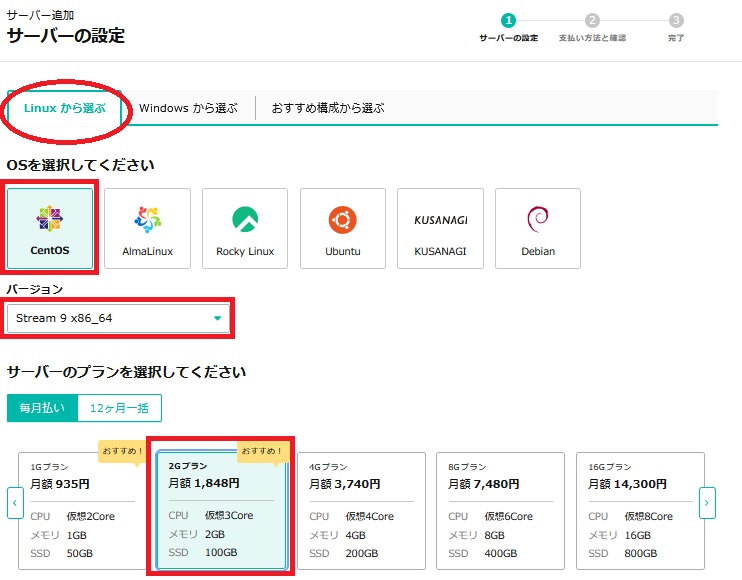
上記画像でメモリ2G以上を選択します。xServerなどの他社ベンダでは2Gからの選択となっておりそれ以下は選択ができないようになっているのですがさくらでは1Gおよび512Mが選択できるようになっています。注意しましょう。
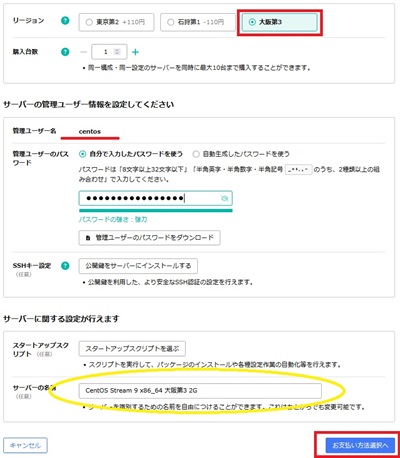
今回選択したのはリージョンは大阪、購入台数1、ここで重要なのが管理ユーザ名がcentosとなっているところです。これに関しては後程管理者権限のrootユーザを作成します。
パスワードを設定してそれをメモ帳などのエディタ、または自分なりの方法で覚えておきます。個人的にはサーバ構築の段階においては頻繁にPuttyなどにログインするのでローカル上のエディタなどに張り付けておくのが作業的には効率的だと思います。なおその場合は端末のHDDパスワードの設定は必ずするようにしたほうがいいでしょう
サーバ名が問題なければ支払いの選択へを押下して進みます。
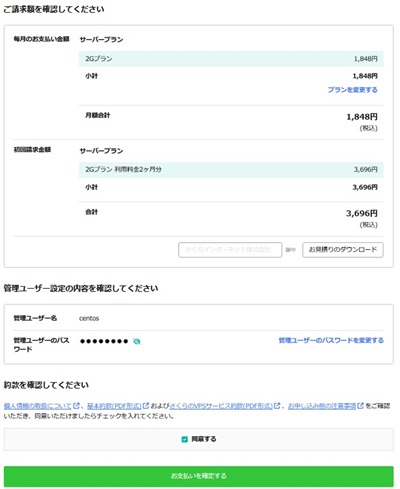
内容の確認ができたら同意するにチェックを入れて支払いの確定ボタンを押します。
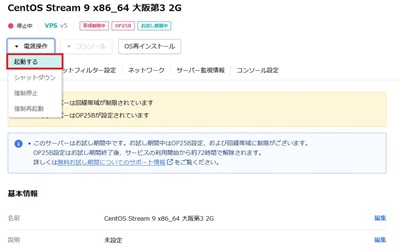
コンパネに入り電源操作をします。
画像のように「起動する」を選択してサーバを起動させます。
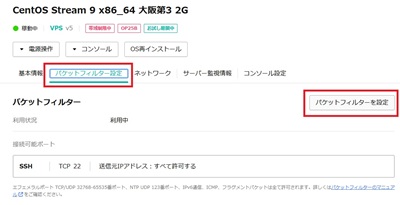
パケットフィルタの追加設定をします。
画像のようにパケットフィルタのタブを選択しパケットフィルタ設定のボタンを押下します。
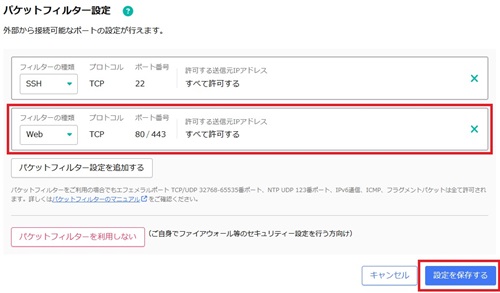
フィルタの種類でWebを選択します。
これで設定を保存します。
Puttyにログイン
Puttyにログインします。詳しいインストールと操作方法はこの後のCentOS7で解説していく予定です。
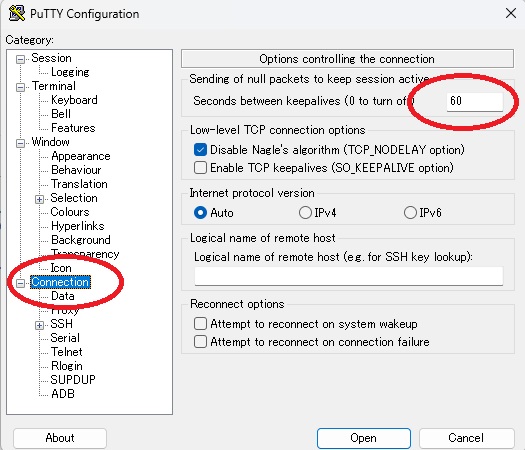
IPアドレスを入力しOpenを押下しますが、この後の手間を省くために画像のようにConnectionとなっているところをクリックします。
右側の赤丸枠の中は通常であればデフォルトで0になっているのでこれを60とかにします。
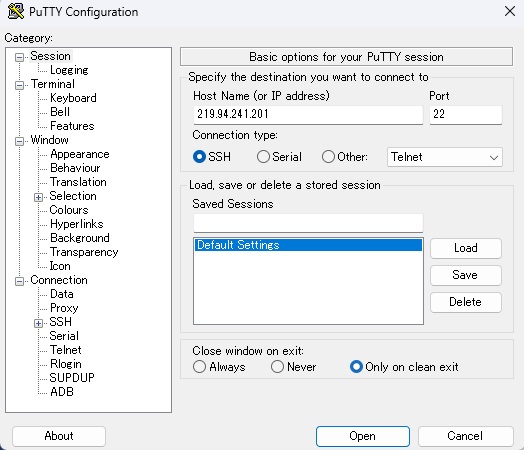
IPアドレスを入力します。
Default Settingsという部分を反転させてからSaveをクリックします。
こうしないとこの設定がその後に反映されません。
管理者rootの追加
次のように入力して管理者権限のrootの設定とそのrootパスワードを設定します。
[centos@xxxxxxxxxxxxx ~]$ sudo passwd root
Changing password for user root.
New password:
Retype new password:
passwd: all authentication tokens updated successfully.
[centos@xxxxxxxxxxxxx ~]$
最初にふれたようにさくらの初期設定でOSがRockyになっており、間違ってRockyを選んでしまってお試し期間をすぐ解約した経緯があるため、念のためOSとそのバージョンを確認しておきましょう。
以下のように入力します。
cat /etc/redhat-release
以下のように表示されていることを確認します。
[centos@xxxxxxxxxxxxx ~]$ cat /etc/redhat-release
CentOS Stream release 9
[centos@xxxxxxxxxxxxx ~]$
dnfの更新
dnf update
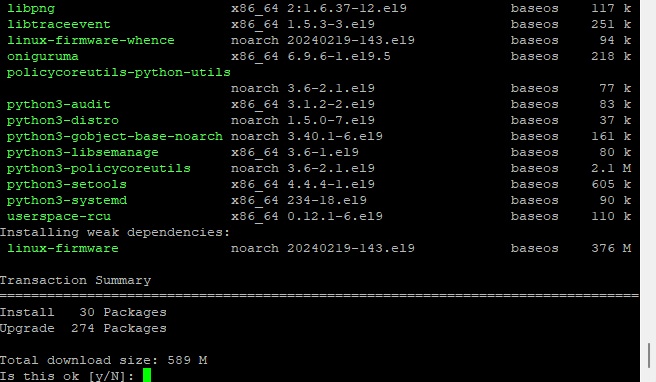
yでEnterを押下して先へ進みます。
dnf upgrade
dnf upgrade

complete!と表示されるのを確認します。
一般ユーザの追加
ここでは一般ユーザとしてvpsuserというのを追加します。名前は適時変更してください。一般ユーザを作成したのちにそのパスワードを設定します。
adduser vpsuser
passwd vpsuser
次のように帰ってくれば問題なく設定されています。
passwd: all authentication tokens updated successfully.
exitと入力していったん管理者からログアウトしsuと入力して管理者でログインしてみましょう。パスワードを聞かれるので先ほど設定したパスワードを入力してログインできることを確認します。
Apache+PHP+PostgreSQL+MariaDB+VIMのインストール
今回こちらのサイト様を参考にさせていただきました。
https://qiita.com/abarth500/items/4abe0c474e31fe1da0c0
dnf install -y httpd mod_ssl httpd-tools httpd-devel httpd-manual php php-cli php-gd php-pdo php-mbstring mariadb mariadb-server vim
httpdの起動
systemctl enable --now httpd
ファイアウォールの起動
systemctl start firewalld
systemctl enable firewalld
Firewallでhttpとhttpsを許可
firewall-cmd --zone=public --add-service=http --permanent
firewall-cmd --zone=public --add-service=https --permanent
firewall-cmd --reload
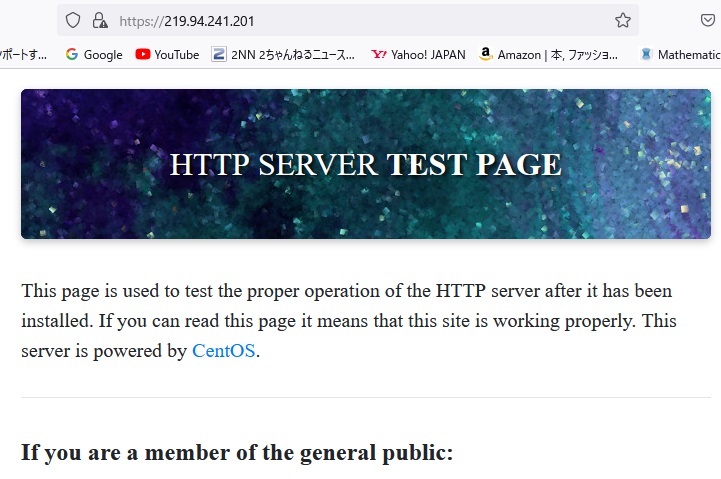
ブラウザでアドレスバーに以下のようにIPアドレスを入力して表示されるかを確認します(xxx.xxx.xxx.xxxは各々取得したIPアドレスになります)。
https://xxx.xxx.xxx.xxx
リロードボタンを押して以下のように表示されればひとまず完了です。
-
diff-eq.comスケールアップアップマイグレーション4
-
TikZ
カテゴリー
-

年金終価係数
カテゴリー
-

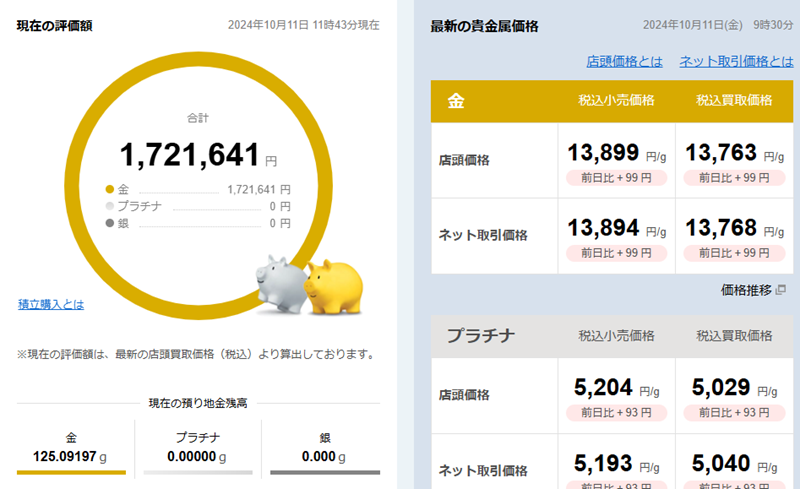
2024年10月金運用成績
カテゴリー
-
金投資
カテゴリー
-

diff-eq.comスケールアップアップマイグレーション3
テスト投稿
-
diff-eq.comスケールアップアップマイグレーション4
-
TikZ
続きを読む
-
年金終価係数
続きを読む
-
2024年10月金運用成績
続きを読む
-
金投資
続きを読む
-
diff-eq.comスケールアップアップマイグレーション3
-
CentOS Stream9 2024インストール – 1
カテゴリー : VPS構築2024 CentOS Strem9-①サテライトサイト「微分方程式いろいろ」のサーバマイグレーションをした際のログになります。メモリ不足によるシステ…